Importing Excel Files |

|

|
Importing Excel Files |
|
|
Step 1 Notes:
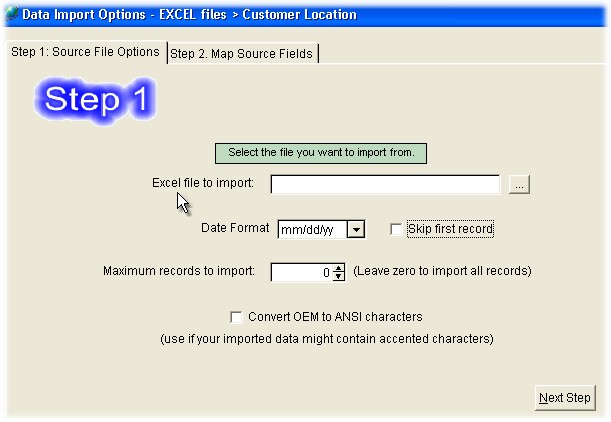
[Excel File to Import] use the [...] elipse button to navigate and select your file.
Use the [View File] button to verify the file that you wish to import.
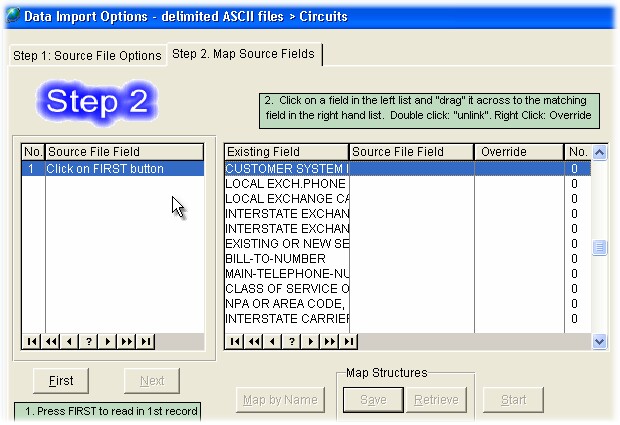
Step 2 Notes:
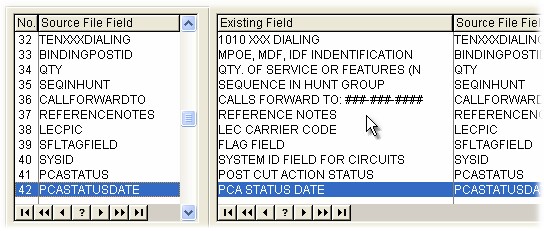
The small browse table on the left is where your import file will apppear. Click on the [First] button to load your data into the browse table. The browse table on the right shows the TelcoMgr file descriptions.
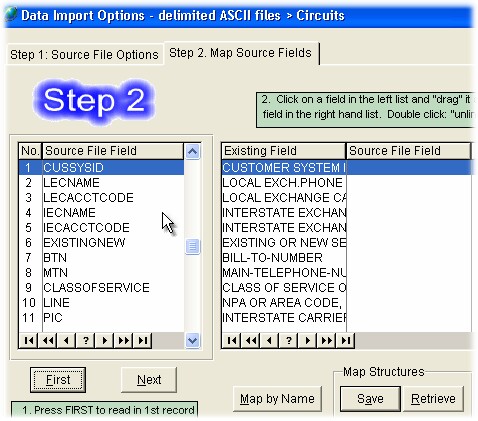
To Map the import fields to the TelcoMgr file, click on a field from the left browse table over to the appropriate line on the right browse table.
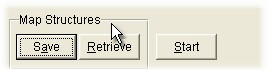
The Map of the import fields can be Saved and Retrieved for reuse.
To complete the Import Process click on the [Start] button.
User Tip: Export a TelcoMgr Locaton, Circuits and/or Directory file as a Comma Separated Value (CSV) file to create a file template for importing data.
User Tip: IMPORT THE LOCATION FILE FIRST SO TELCOMGR CAN CREATE THE CUSTOMER SYSTEM ID (CusSysID) number automatically. The appropriate CusSysID must appear in each record that is imported into the CIRCUITS and DIRECTORY files.
User Tip: Do not import data into [RESERVED]fields.